Importing Transactions
Last updated May 5, 2025
The Import Transactions feature in Hypercore allows lenders to efficiently upload multiple transactions at once, either from a CSV file or through manual entry. This is especially useful for importing bank statements, aligning with expected repayment reports, or entering historical data.
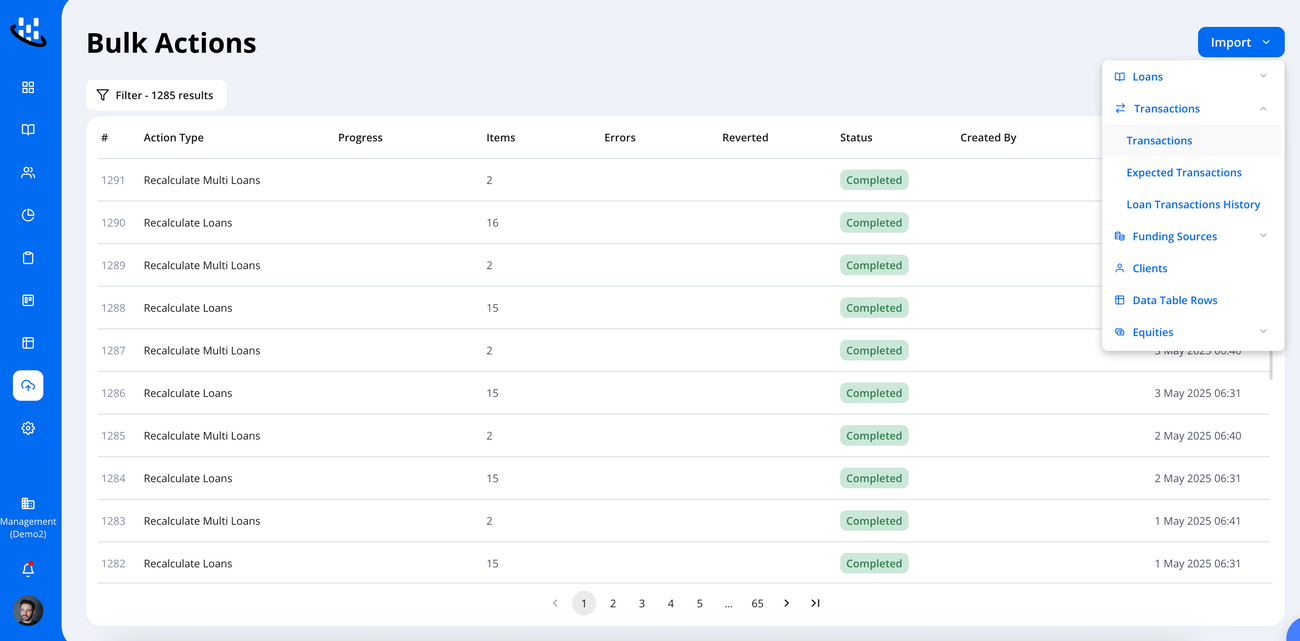
Navigation: Access the Import Tool
To get started:
- Click Bulk Actions from the sidebar.
- Select Import → Transactions.
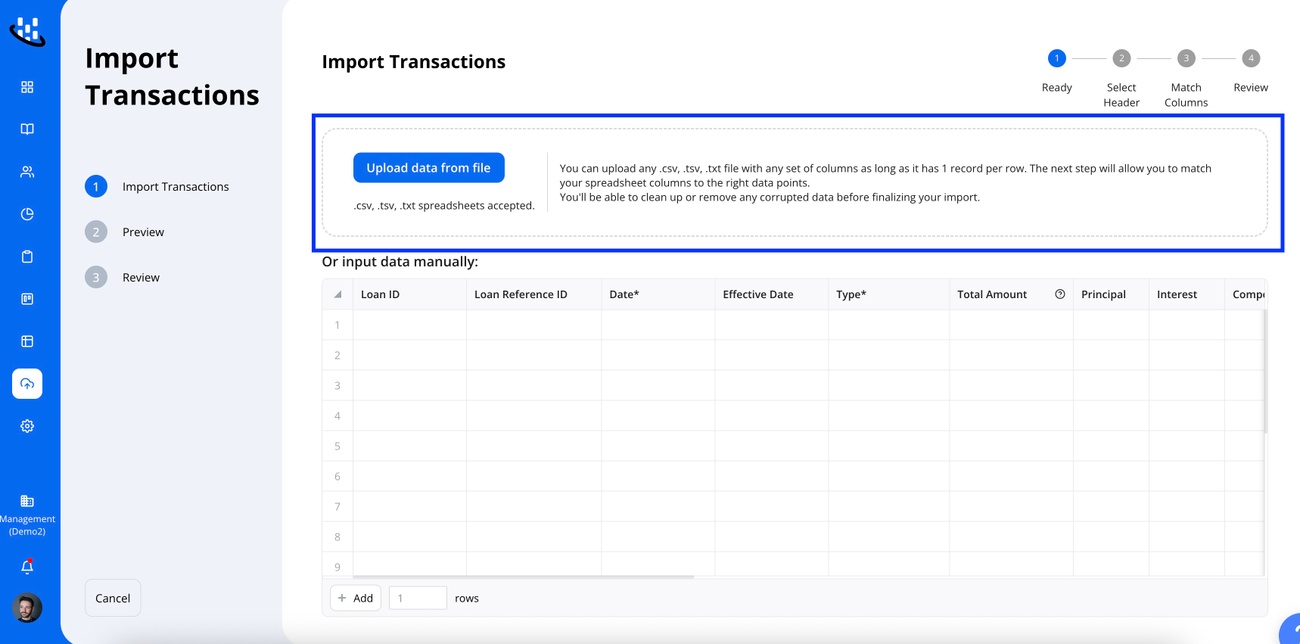
Importing from a File
This is the most common workflow for importing data in bulk.
1. Upload a File
- Click Upload Data from File.
- Select your
.csvfile.
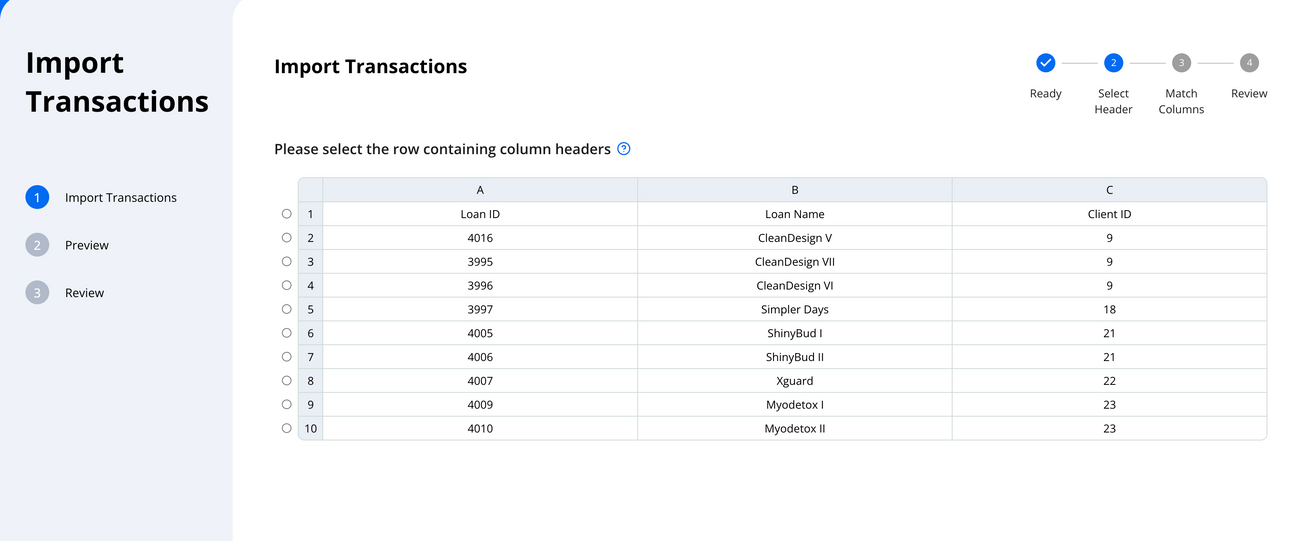
2. Define Header Row
Mark the row in your CSV that contains column headers.
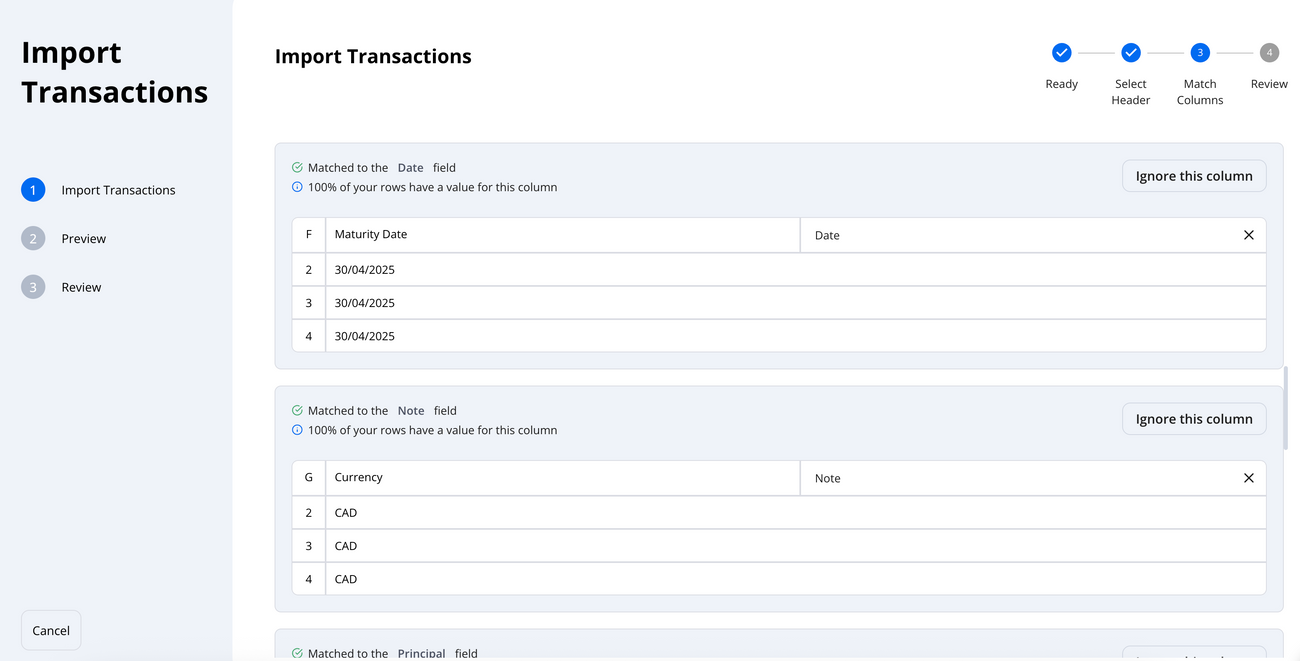
3. Map the Columns
- Match the CSV columns to platform fields:
- Loan ID (Required)
- Date (Required)
- Type (e.g., Disbursement, Repayment)
- Amount or Components (Principal, Interest, Fees)
You can also ignore irrelevant columns.
4. Data Validation
The platform automatically validates input:
- Required fields are highlighted in red if missing.
- Dates and numbers must be in valid formats.
- Data can be manually edited if needed.
- You can either:
- Enter specific Repayment Components (e.g., Interest or Fees).
- Enter Total Amount, which automatically calculates components based on the loan's repayment strategy.
- Note: Entering both total amount and components simultaneously will trigger an error.
Callout: The recommended approach is to fill in the individual components to avoid mismatches.

Manual Entry
Instead of uploading a CSV, you can enter transactions directly into the table.
To do so:
- Click on the table area.
- Fill in the relevant details:
- Loan ID
- Date
- Amount
- Type
This method is helpful for entering a small batch of transactions.

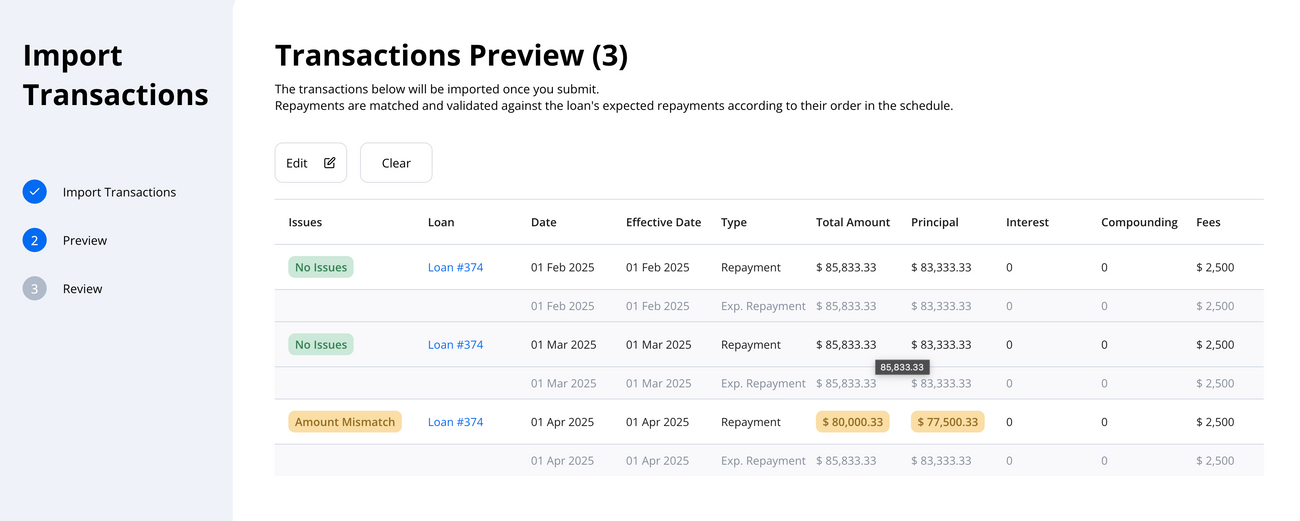
Transaction Preview
After uploading a file or entering transactions manually, you'll be taken to the Transaction Preview screen. This screen allows you to review and confirm the imported data before it's finalized.
What You'll See:
- A row-by-row preview of all imported transactions.
- Each transaction is mapped to its corresponding loan.
- The amount is automatically split across components (e.g., principal, interest, fees, compounding) based on the loan’s repayment strategy.
Repayment Matching and Validation
Hypercore validates the imported repayments by comparing them against the loan's expected repayment schedule. The platform uses the repayment order defined in each loan’s settings (e.g., fees → principal → interest) to:
- Automatically allocate amounts when only a total is provided.
- Highlight mismatches between imported and expected repayments.
This ensures that the transactions are aligned with the original amortization logic of the loan.
If there's a mismatch (e.g., the imported transaction differs from the expected schedule), the system will display a warning. You can:
- Ignore the warning if the difference is intentional.
- Edit the transaction to correct the data.
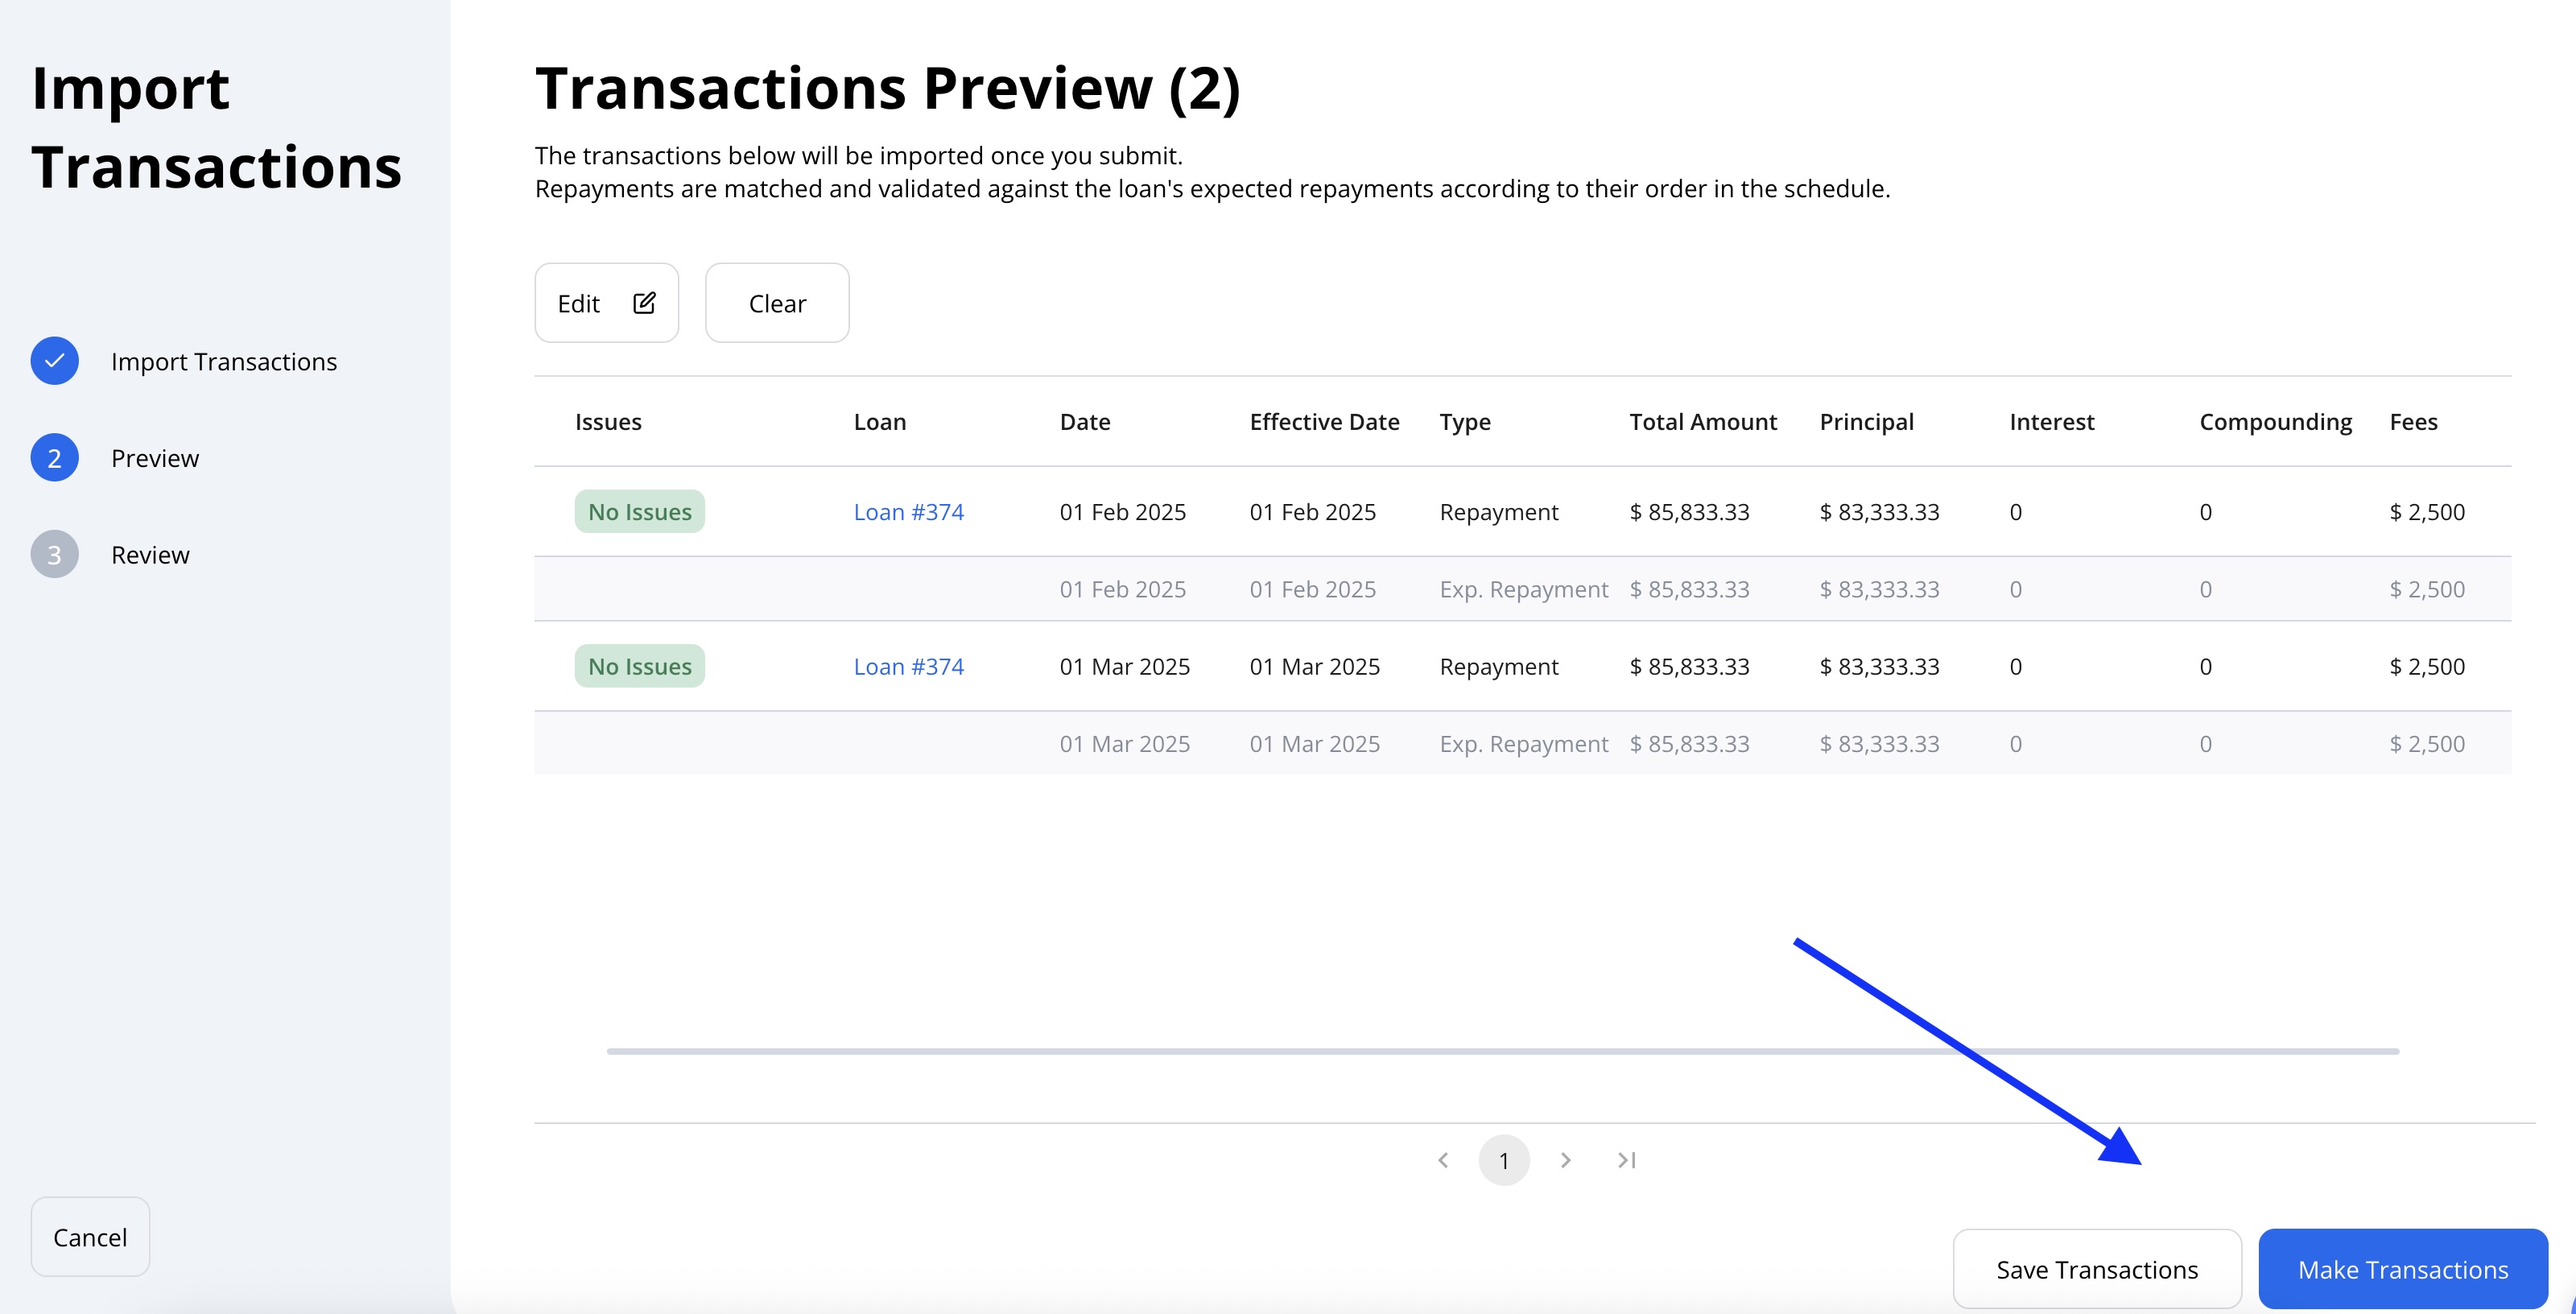
After confirming your transactions, you can either:
- Save for later: allows team members to review and approve.
- Execute (Make Transactions): immediately applies the transactions.
Import Transaction Review
After uploading and previewing your data, you’ll be directed to the Review Import page. This step lets you confirm, export, or save transactions before finalizing them.
What You’ll See
- A full list of imported transactions
- Mapping of each transaction to a loan
- Amounts split across Principal, Interest, Fees, and Compounding
- Status filters (e.g. Imported, Pending, Failed)
- Validation messages for any mismatches with expected repayment schedules
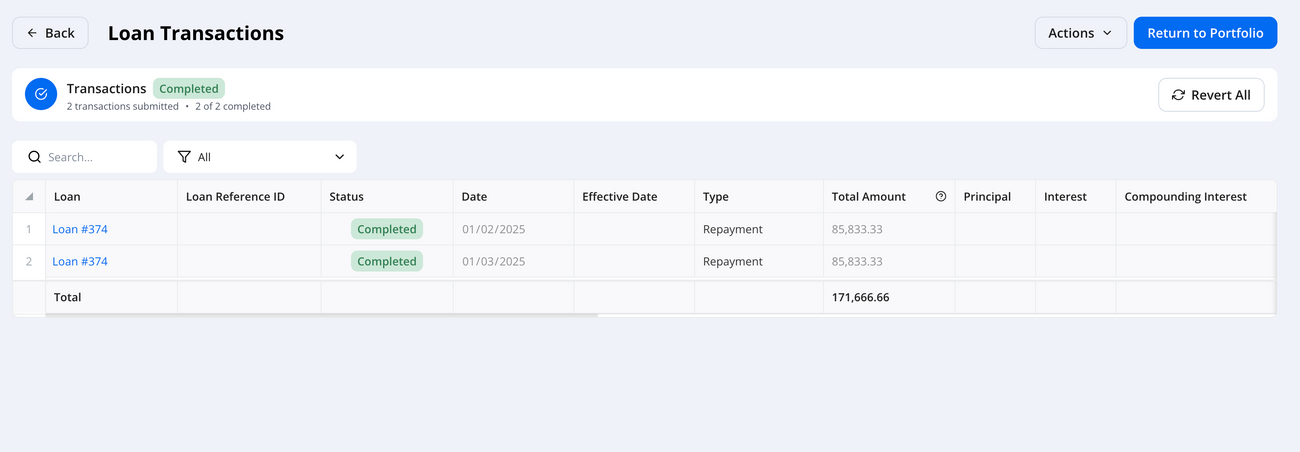
Actions Available
- Revert Transactions: explained below.
- Export to CSV: Download a file with full transaction details for external review or archiving.

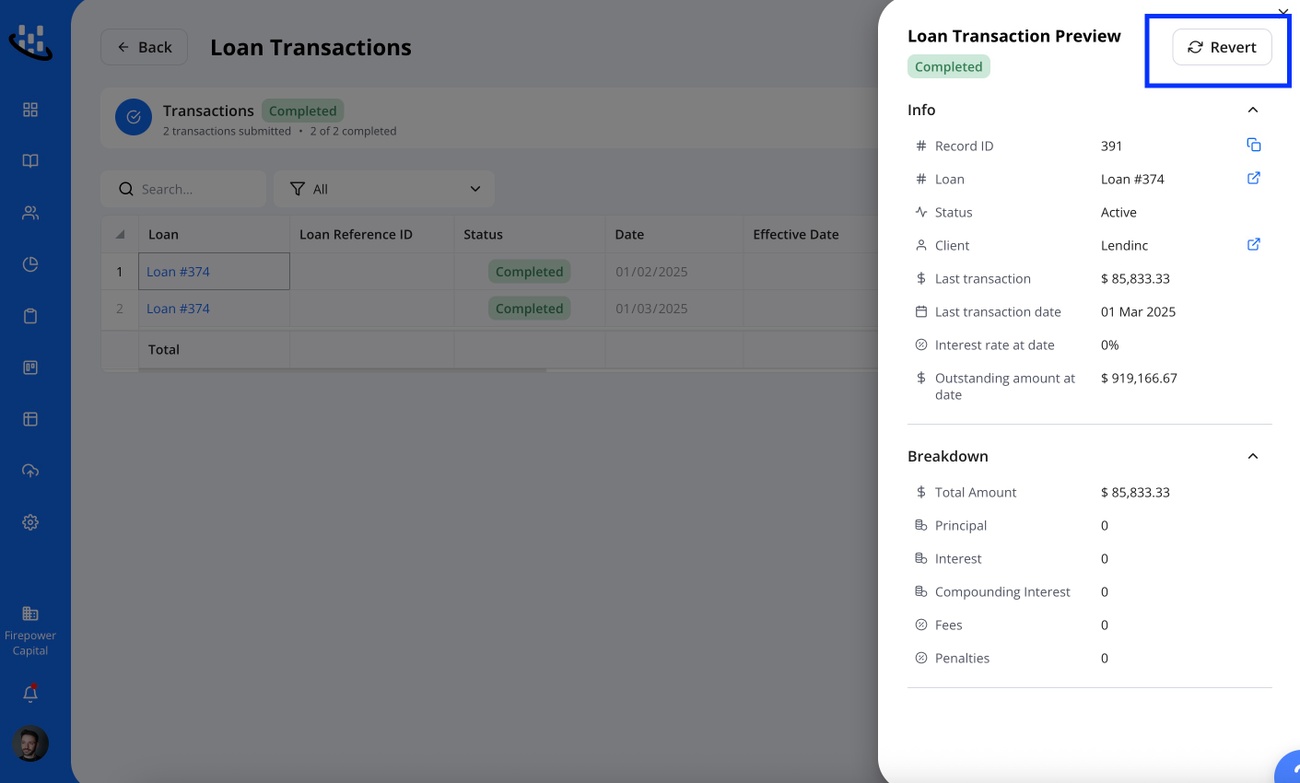
Reverting Transactions
If a mistake is identified after execution, you can:
- Revert an entire import batch via the Import screen
- Revert a single transaction using the More Actions menu in the transaction row
This provides flexibility to correct errors without manual cleanup.